A yoga logo is your chance to introduce yourself and what you have to offer to the world. It’s a creative visual reminder that demonstrates your personality and how you’re different from the competition. Creating the right yoga logo helps connect you and your clients on an emotional level.
How to Create a Yoga Logo
With today’s online resources, creating a logo for your yoga studio doesn’t require expensive and time-consuming sessions with a professional marketing agency. In fact, we’ll walk you through the entire process here, so you’ll end up with a professional, creative and unique logo that you can be proud to display.
Materials Needed
Before you get started, make sure you have time to devote to creating your logo. Don’t worry too much about it though, if you don’t have a lot of time to spare. LogoMaker, a superb resource offered by a professional logo company, has a quick-and-easy process that can get you up and running in just a short time. Best of all, you can create a free account to save all your logos before deciding on a final version.

LogoMaker’s step-by-step process makes creating your own yoga logo easy. Start by navigating to logomaker.com. When you see the above page, you’ll know you’ve arrived at the right place!
Step 2: Start Your Logo
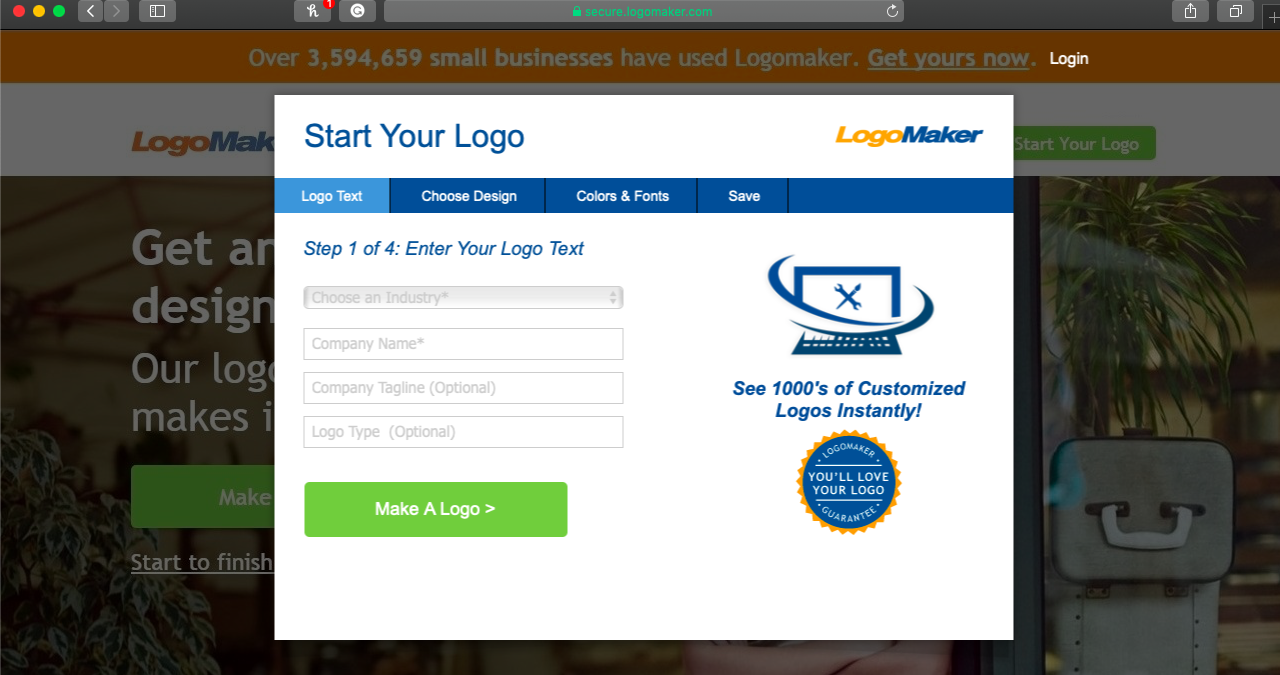
Next, click on the “Start Your Logo” button located in the upper right corner of the homepage. Once you do so, you’ll see the above screen.
Note the lock icon and the word “secure” in the LogoMaker’s address bar. This lets you know that any information you input on these pages is encrypted using the latest technologies. You can rest assured that your ideas, designs and other information are safe from the prying eyes of your competitors or anyone else.
Step 3: Enter Your Logo Text
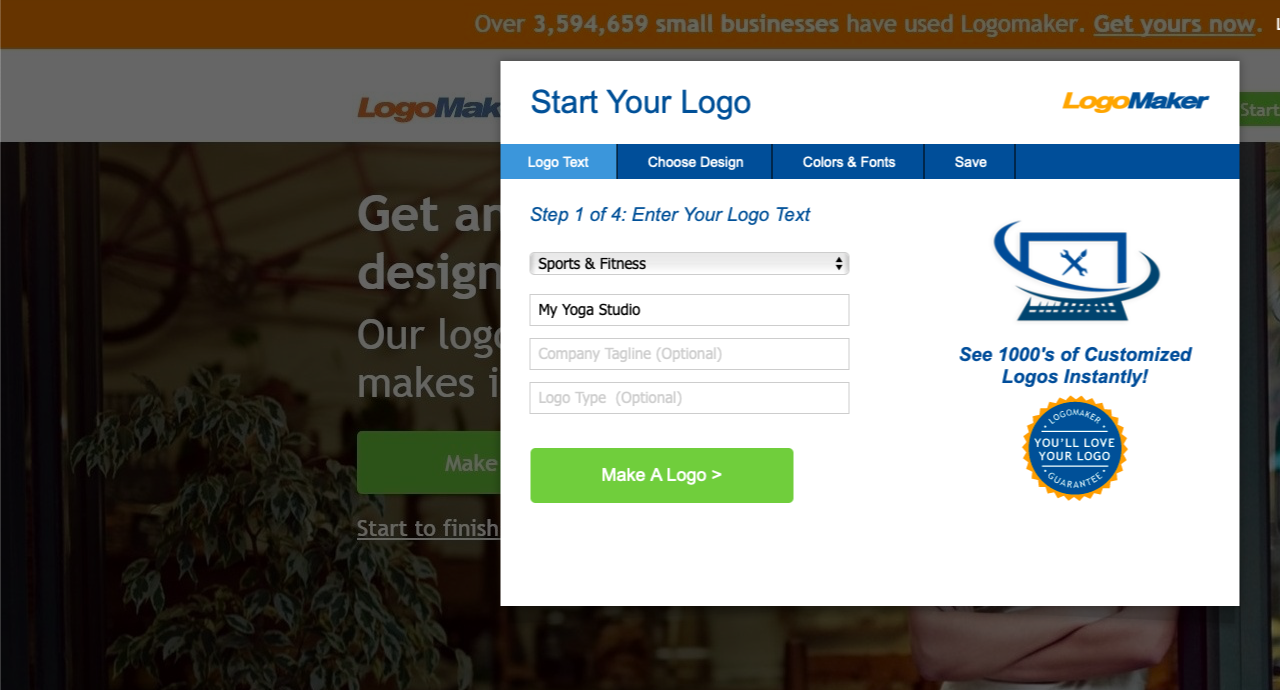
From this screen, you’ll enter the relevant information about your yoga studio. Start with the drop-down menu labeled “Choose an Industry.”
Next, put your company name in the appropriate place. Fill out the section for your company tagline, if you have one, as well as the type of logo. Click the green “Make a Logo” button after you’ve filled in all the information.
In this example, we chose the “Sports & Fitness” industry. For the name, we simply inputted the highly creative and original “My Yoga Studio” as our company name.
Step 4: Choose Your Logo Style
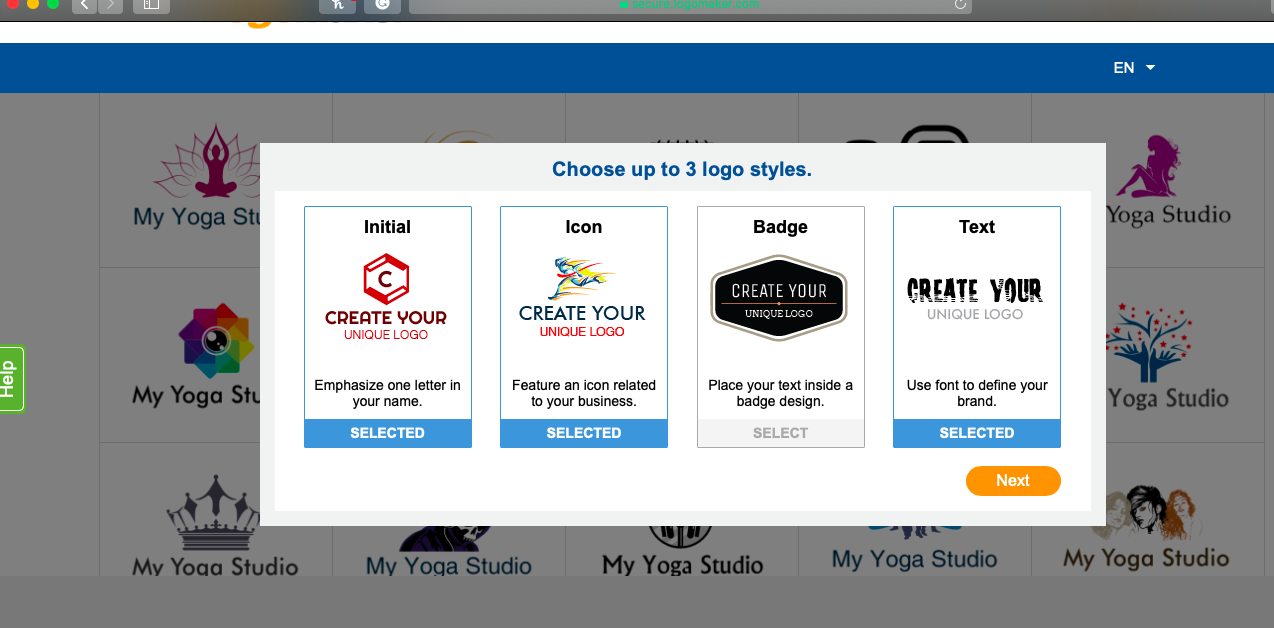
LogoMaker allows you to choose up to three logo styles to highlight your logo. With the “Initial” logo style, one letter of your company name is emphasized. The “Icon” logo style features a business-related icon. With the “Badge” logo style, the text is located inside a badge design. The “Text” logo option lets you use a specific font to make your brand unique.
You’ll notice a number of logo options that appear in the background as well. These provide you with an idea as to what your finished logo might look like.
For our example, we chose the Initial, Icon and Text options to create our unique logo. Once you’ve made your selections, click the orange “Next” button.
Step 5: Choose a Font
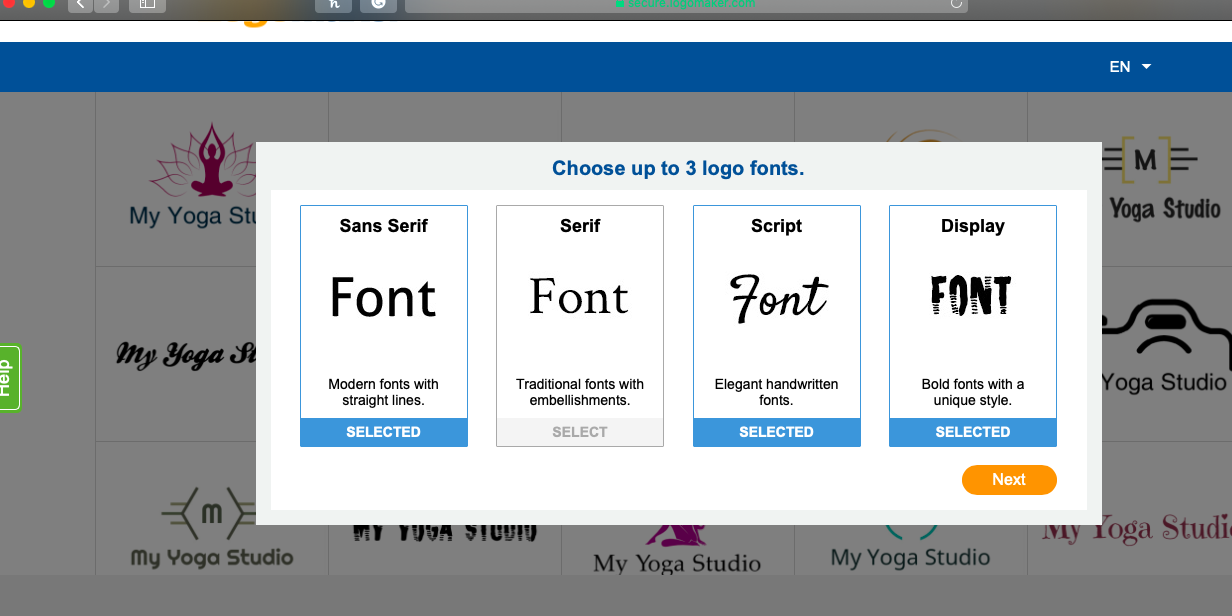
If you decided on “Font” as an option for your logo like we did, you’ll have the option to choose up to three logo fonts on the next screen. Your choices include sans serif, serif, script and display fonts. Once you’ve decided, click the orange “Next” button.
Check out our choices in the screenshot above!
Step 6: Choose Your Logo Layout
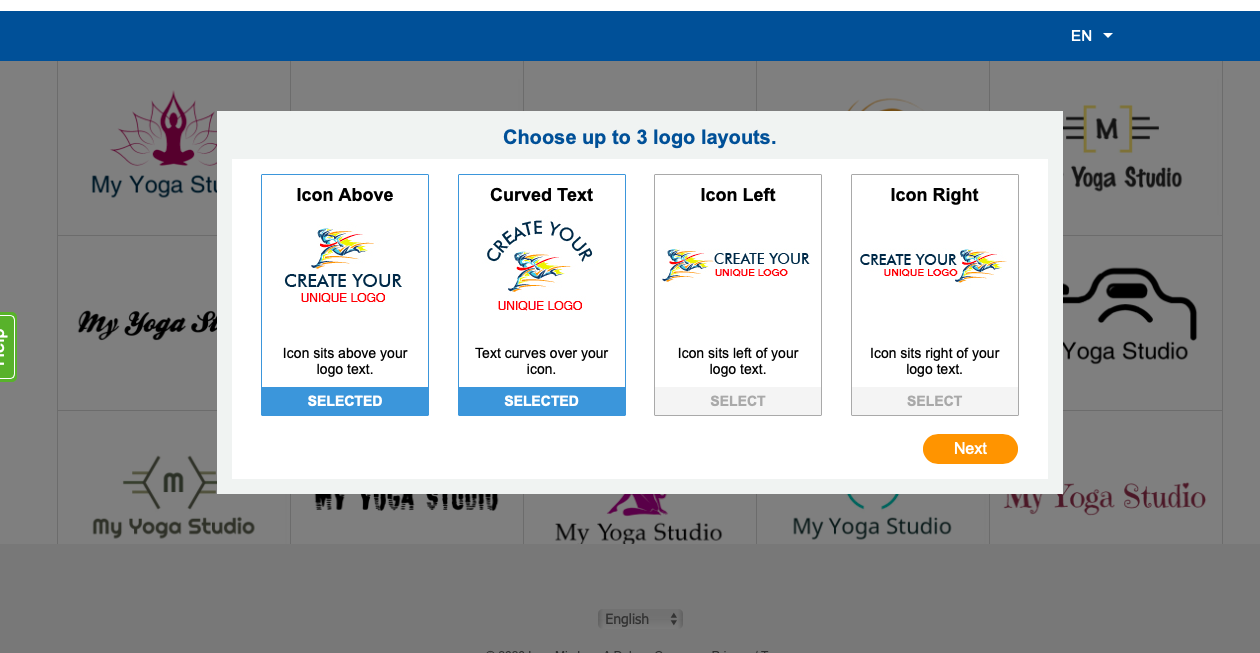
The next screen will bring you to the section of the process in which you choose the actual layout of your logo. You’ll note on the screenshot above that our options are relevant to the choices we made initially, specifically, the use of an icon and text within our logo.
Again, you’ll be prompted to choose up to three logo layouts. In our example, you’ll see that we could choose from three options: having our icon located above our text, to the right of the text or to the text’s left.
An additional option allows us to choose text that curves over our icon. For our fictitious yoga studio, we decided to have curved text that sits above our icon, an icon that is located over our text and an icon placed to the right of our text.
Once you’ve decided, click on the orange “Next” button below the choices.
Step 7: Select Your Logo Design
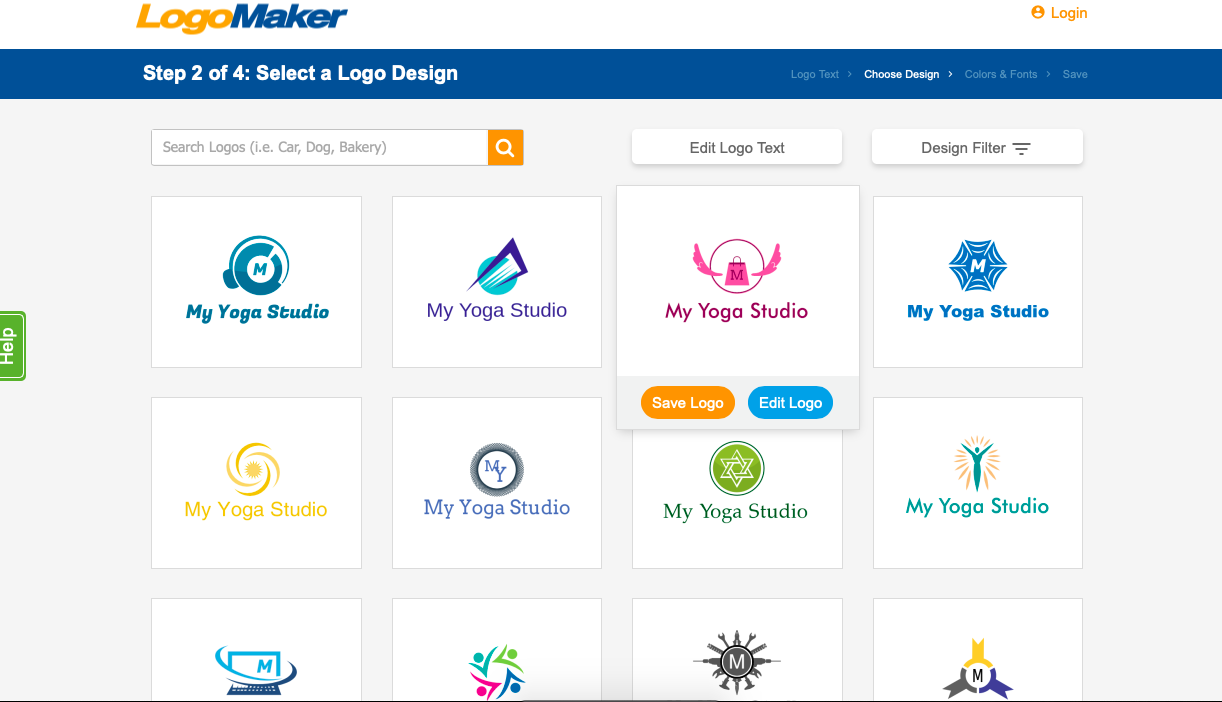
Here’s when the real fun begins! During this step of the process, you’ll be able to access more than 10,000 professionally-designed logos.
You can easily navigate to a different page of logo designs by clicking the numbers at the bottom. Filter your logo options by using the robust search feature.
Other options available from this page include the ability to edit your logo text. Click on it to add another line to your logo or to change the information you already put there. Be sure to click “Apply,” so any changes you made are saved. You’ll then be able to see what your changes will look like.
You’ll also see an option called “Design Filter.” Clicking on that will bring up the menu of options that you previously chose. You can check and uncheck boxes before clicking “Apply” to see how various changes will affect your logo.
Step 8: Edit Your Logo
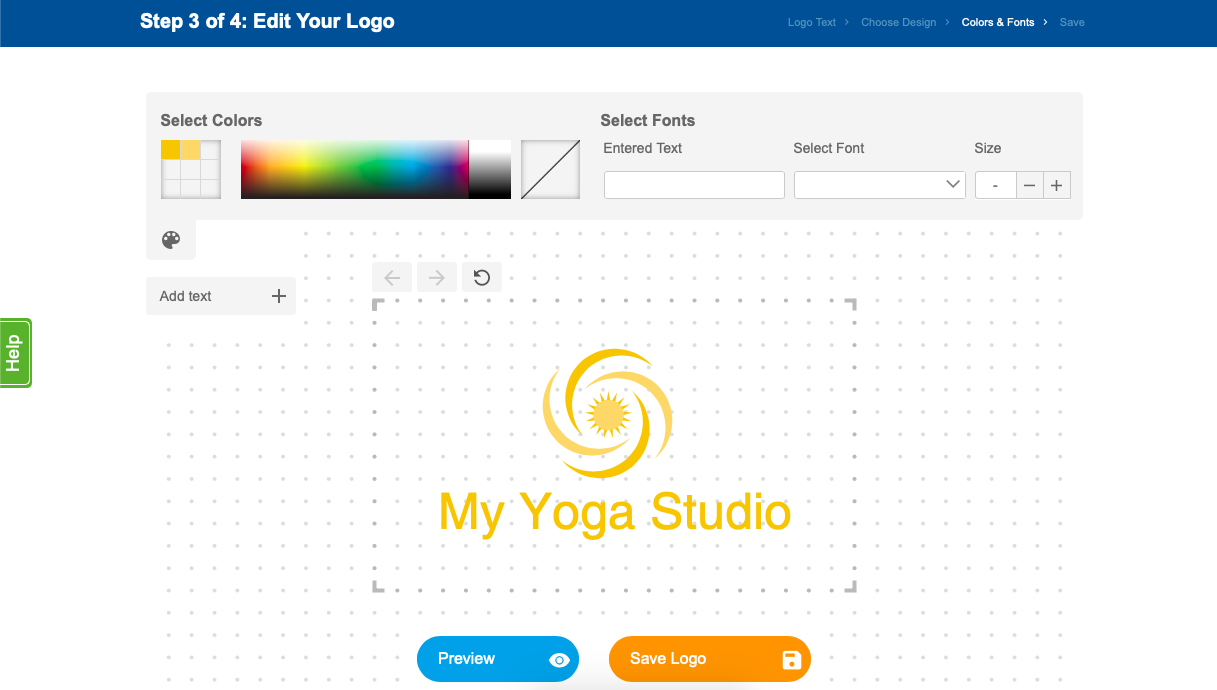
Once you’ve decided on a particular logo, you can choose to edit it further. Simply choose the “Edit Logo” button instead of the “Save Logo” button.
Here, you’ll see lots of options that let you further personalize your logo and make it uniquely yours. Click around on different areas of the logo to discover which choices you have for additional customization.
Select the exact colors and shades to fit your vision. Play around with the fonts and sizes to find what works best for the design you’ve chosen.
Once you’re happy with the results, it’s time to move on to the final step…
Step 9: Save Your Logo
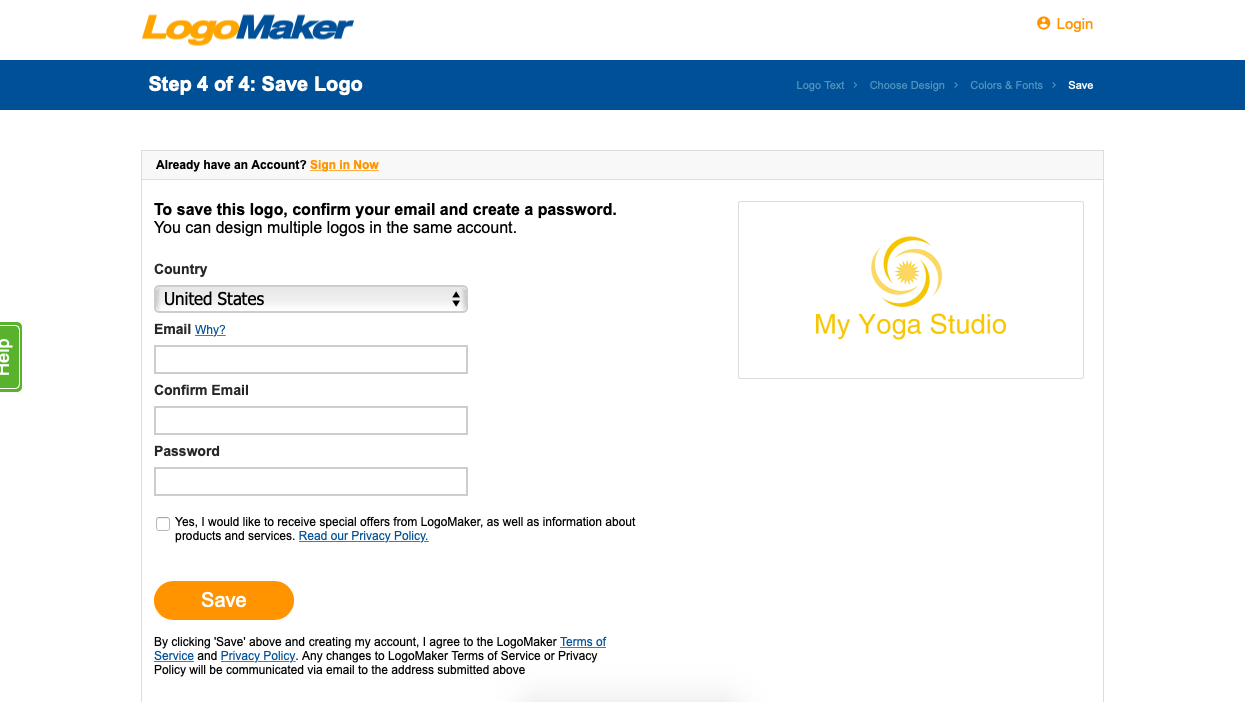
You’ll see the above screen when you click on “Save Logo.” Simply fill out the fields to create your free account. Once you’ve done so, you’ll be able to save unlimited design logos as long as you want to.
The Final Word on How to Create a Yoga Logo
Creating a yoga logo doesn’t have to be a long and tedious task that you dread. Using LogoMaker means you have complete control over every aspect of your logo design. Come back any time, sign in to your account and create more logos when it’s convenient for you.
Using the simple process that LogoMaker has developed means you can go from the kernel of an idea to a finished logo in just 5 minutes. Best of all, LogoMaker offers tons of great promotional products and other ways to get the word out about your yoga studio.
Whether you’re just getting started or you’re refreshing your business logo, LogoMaker has the right package for the needs of your yoga studio. More than 20 million small businesses around the globe use LogoMaker to create their own logos and enjoy their exceptional customer support.


